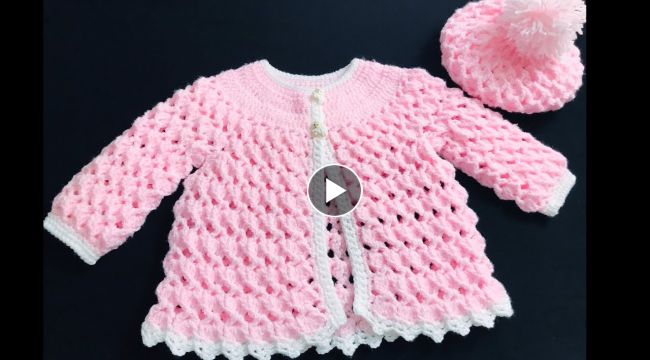
Crocheting a baby sweaterjacket andhat set is a fun and practical way to keep your little one warm and stylish during the colder months. With some basic crochet skills and a few materials, you can easily create a cozy outfit that will be perfect for your baby.
Materials Needed
Yarn in your desired color
Crochet hook (size G is recommended for worsted weight yarn)
Scissors
Stitch markers
Tape measure
Buttons (optional)
Step-by-Step Instructions
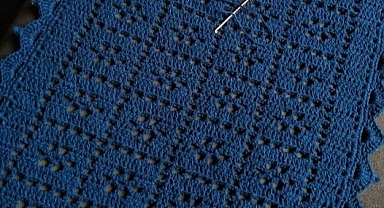
Baby Sweater Jacket
Begin by creating a foundation chain that measures about 30 stitches for a newborn size, 36 stitches for a 3-6 month size, and 40 stitches for a 6-12 month size.
Join the foundation chain with a slip stitch to form a circle.
Chain 3 and double crochet in each stitch around. Slip stitch to the top of the chain 3 to join.
Chain 3 and double crochet in the first stitch. Double crochet in the next stitch. *Chain 1, skip 1 stitch, double crochet in the next 2 stitches.* Repeat from * to * around. Slip stitch to the top of the chain 3 to join.
Chain 3 and double crochet in the first stitch. *Chain 1, skip 1 stitch, double crochet in the next stitch.* Repeat from * to * around. Slip stitch to the top of the chain 3 to join.
Repeat step 5 until the sweater measures the desired length for your baby. For a newborn size, this is typically around 8-10 inches. For a 3-6 month size, this is typically around 10-12 inches. For a 6-12 month size, this is typically around 12-14 inches.
Create the armholes by counting in 8-10 stitches from each side of the sweater (depending on the size you are making). Place a stitch marker in these stitches. Then, chain 3 and double crochet in the next stitch. Double crochet in each stitch until you reach the first stitch marker. Chain 2 and skip the stitches between the two stitch markers. Double crochet in each stitch until you reach the second stitch marker. Chain 2 and skip the stitches between the two stitch markers. Double crochet in each stitch until the end of the row. Slip stitch to the top of the chain 3 to join.
Repeat step 7 for one more row.
Chain 1 and single crochet in each stitch around. Slip stitch to the top of the chain 1 to join.
Repeat step 9 for one more row.
Fasten off and weave in any loose ends.
Optionally, you can add buttons to the front of the sweater for a cute touch.
Crocheting a Baby Hat
After finishing the sweater jacket, you can also make a matching hat to complete the set. Here's how you can crochet a simple baby hat:Start with a magic circle and chain 3. This counts as your first double crochet (dc).Round 1: Make 11 double crochets (dc) in the magic circle. Slip stitch (sl st) to the top of the chain 3. (12 dc)Round 2: Chain 3, make a dc in the same stitch as the chain 3. Make 2 dc in each stitch around. Sl st to the top of the chain 3. (24 dc)Round 3: Chain 3, *make 1 dc in the next stitch, 2 dc in the following stitch*. Repeat from * to * around. Sl st to the top of the chain 3. (36 dc)Round 4: Chain 3, *make 1 dc in the next 2 stitches, 2 dc in the following stitch*. Repeat from * to * around. Sl st to the top of the chain 3. (48 dc)Round 5-9: Chain 3, make 1 dc in each stitch around. Sl st to the top of the chain 3. (48 dc)Round 10: Chain 1, make 1 single crochet (sc) in each stitch around. Sl st to the first sc. Fasten off and weave in ends.Now it’s time to add a cute pom-pom to the top of the hat. Using the same yarn or a contrasting color, cut a 10-inch length of yarn and set aside. Wrap the yarn around your fingers 20-30 times (depending on how full you want the pom-pom to be). Tie the 10-inch piece of yarn tightly around the center of the loops and trim the ends. Trim the pom-pom to shape it and then attach it to the top of the hat.Your baby hat is now complete! You can make it in different colors and sizes to create a whole collection for the new little one in your life.Happy crocheting!