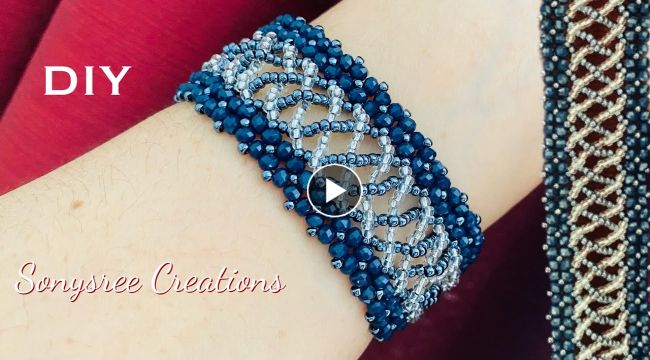
If you're looking for a stylish and unique bracelet to add to your jewelry collection, a beaded waves bracelet is a great option. This bracelet features a beautiful wave pattern made out of beads and can be customized with any colors you like. In this tutorial, we'll show you how to make your own beaded waves bracelet from start to finish.
Materials You'll Need
Beads in your desired colors
Beading thread
Beading needle
Scissors
Clasp
Jewelry pliers
Step-by-Step Instructions
Step 1: Cut the Thread
Start by cutting a length of beading thread to the desired length of your bracelet, plus a few extra inches. This will give you enough thread to work with as you add beads and attach the clasp.
Step 2: Add the First Row of Beads
Thread a bead onto the center of your thread, and tie a knot to secure it in place. Then, add two more beads to each side of the center bead, and tie a knot to secure them. Continue this pattern until you have added enough beads for the first row of your bracelet.
Step 3: Add the Second Row of Beads
Next, add one bead to each end of the thread, and thread the needle through the last bead of the first row. Add two more beads to each side of the center bead, and tie a knot to secure them. Continue this pattern until you have added enough beads for the second row of your bracelet.
Step 4: Continue the Pattern
Repeat steps 2 and 3 until your bracelet is the desired length. Make sure to alternate the colors of your beads to create the wave pattern.
Step 5: Add the Clasp
Once you have reached the desired length for your bracelet, tie off the thread and add the clasp using jewelry pliers. Make sure the clasp is secure before wearing your new beaded waves bracelet.
Final Thoughts
Making your own beaded bracelet is a fun and easy DIY project that can be customized to fit your personal style. With just a few materials and some patience, you can create a beautiful piece of jewelry that you'll love to wear.Don't be afraid to experiment with different colors and bead sizes to create a unique bracelet that reflects your personal taste. Have fun and happy beading!