How to Knit Baby vest with Tiny Reliefs Pattern
If you are looking for a fun and easy
knitting project to make for a baby, a vest with a
tiny reliefs pattern could be just what you need. This
pattern is perfect for those who have basic knitting skills and are looking to try something new.
Materials You Will Need:
- 2 skeins of baby yarn (in the color of your choice)
- Size 8 knitting needles
- Stitch markers
- Yarn needle
- Scissors
Instructions:
Step 1: Cast On
Cast on 60 stitches using the long-tail cast on method.
Step 2: Ribbing
Knit in a 2x2 ribbing pattern for 2 inches.
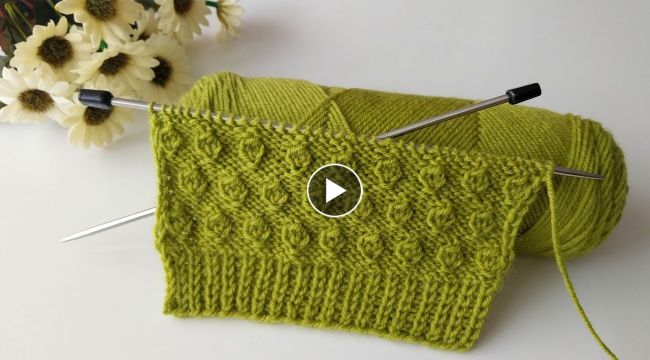
Step 3: Tiny Reliefs Pattern
Row 1: Knit across all stitches.Row 2: *Knit 2, purl 2, repeat from * across all stitches.Row 3: Knit across all stitches.Row 4: *Purl 2, knit 2, repeat from * across all stitches.Repeat these four rows until the piece measures 8 inches.
Step 4: Armholes
Bind off the first 6 stitches on the next two rows.
Knit across the remaining stitches.
Step 5: Back
Continue knitting until the back of the
vest measures 6 inches from the armhole bind off.
Step 6: Shoulder
Bind off the center 16 stitches for the neckline. Knit each side separately for 2 inches. Bind off the remaining stitches.
Step 7: Front
With the right side facing you, pick up and knit 24 stitches along the side of the right armhole. Knit across the bound off stitches for the neckline. Pick up and knit 24 stitches along the side of the left armhole. Knit across the remaining stitches.
Step 8: Tiny Reliefs Pattern
Repeat the
tiny reliefs pattern until the front of the vest measures 6 inches from the armhole bind off.
Step 9: Ribbing
Knit in a 2x2 ribbing
pattern for 2 inches.
Step 10: Bind Off
Bind off all stitches and weave in ends.
Conclusion
There you have it! A beautiful and cozy
baby vest with a tiny reliefs pattern that you can easily knit at home. Don't be afraid to experiment with different yarn colors to make it unique and personal. Your little one is sure to love wearing it!
