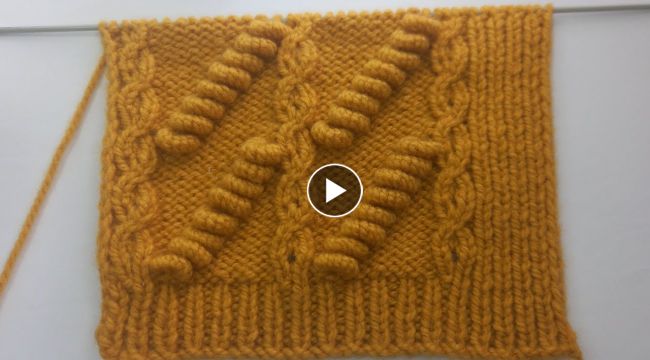
How to Knit a Relief Springs pattern Vest
If you're looking for a challenging and unique knitting project, a
relief springs pattern vest may be just what you're looking for. This
intricate pattern creates the appearance of
springs in relief, adding a dynamic and textured look to your vest. Here's how to knit a
relief springs pattern vest:
Materials You'll Need
- Yarn in your preferred color and weight
- Knitting needles in the appropriate size for your yarn
- Tape measure
- Scissors
- Stitch markers
- Large eye tapestry needle
Instructions
Step 1: Cast on an even number of stitches. We recommend casting on around 120 stitches for a standard size vest.
Step 2: Knit 2 rows in your preferred color to create the base for the vest.
Step 3: Begin the relief springs pattern by knitting 3 stitches together, then knitting 3 stitches separately. Repeat this pattern across the entire row.
Step 4: On the next row, knit the knit stitches and purl the purl stitches as they appear.
Step 5: On the next row, knit 1 stitch, then yarn over, then knit 1 stitch, then yarn over, then knit 3 stitches together. Repeat this pattern across the entire row.
Step 6: Repeat steps 4 and 5 until your
vest is the desired length.
Step 7: Bind off your stitches and weave in any loose ends.
Step 8: Sew the side seams of your vest together, leaving armholes for a comfortable fit. You can also use stitch markers to mark where you want your armholes to be.
Step 9: Add any finishing touches, such as buttons or pockets, as desired.Congratulations, you have now completed your relief springs pattern vest!Remember to block your vest to help it maintain its shape and texture. You can do this by soaking it in water, gently squeezing out the excess water, and laying it flat to dry.Knitting a relief springs pattern vest is a challenging and creative project that will add some unique texture to your wardrobe. With a little bit of practice and patience, you can create a beautiful vest that you can be proud to wear.Have fun knitting your relief springs pattern vest, and happy stitching!