How to Knit a Cicada Model Vest
If you're looking for a stylish and unique
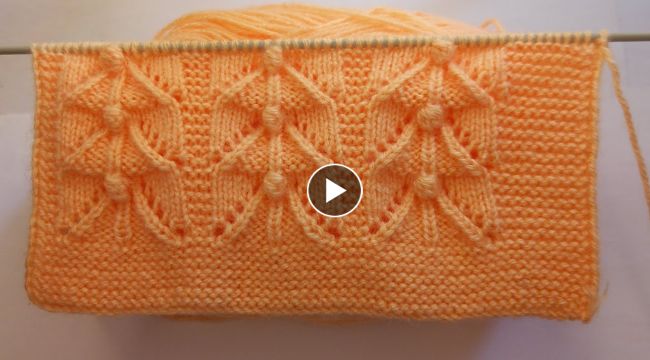
vest to add to your wardrobe, consider knitting a
cicada model vest. This vest features a beautiful
cicada pattern that is sure to catch everyone's eye. Here's how to get started:
Materials Needed
- 3 skeins of worsted weight yarn in a color of your choice
- Size 8 knitting needles
- Stitch markers
- Tapestry needle
- Scissors
Instructions
Follow these steps to knit your own cicada model
vest:
1. Cast onCast on 80 stitches onto your size 8 knitting needles. Place a stitch marker at the beginning of your row.
2. Knit the ribbingKnit 1 purl 1 ribbing for 4 rows. This will create a stretchy band around the bottom of the vest.
3. Begin the patternBegin the cicada
pattern by knitting the first 4 stitches, then placing a stitch marker. Knit 12 more stitches, then place another stitch marker. This is the first repeat of the pattern. Continue this pattern across the entire row.
4. Knit the bodyContinue knitting the
cicada model for 10 inches or until the vest is the desired length. Remember to always place a stitch marker at the beginning of each repeat.
5. Knit the armholesOnce the vest is the desired length, knit the armholes. To do this, knit 21 stitches, then bind off 12 stitches. Knit the remaining 35 stitches and place a stitch marker. Turn your work and knit back across the row. When you reach the bound-off stitches, cast on 12 new stitches. Continue
knitting the remaining stitches and place a stitch marker.
6. Finish the backKnit the back of the vest in the cicada pattern for 10 inches or until it is the same length as the front. Bind off all stitches.
7. Finish the armholes and neckUsing your tapestry needle, sew up the sides of the armholes. Then, pick up stitches around the neck and knit 4 rows of knit 1 purl 1 ribbing. Bind off all stitches.Your cicada model vest is now complete and ready to wear!
Conclusion
Knitting a cicada model vest may seem daunting, but with the right materials and instructions, it's a fun and rewarding project. Follow these steps and you'll have a beautiful vest that will add a unique touch to your wardrobe.Happy knitting!