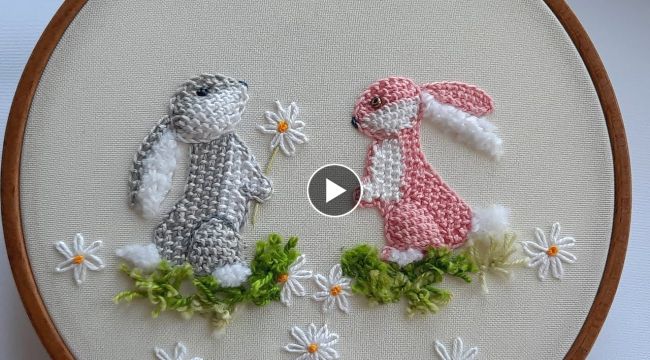
How to Embroider a 3D Rabbit
Embroidery is a beautiful art form that has been around for centuries. It involves creating designs on fabric by stitching with various threads, yarns, and needles. Embroidery can be done on various fabrics and materials, including clothing, hats, and even home decor items.In this blog post, we will guide you on how to
embroider a 3D rabbit. This is a fun project that is perfect for beginners and experts alike. So grab your embroidery supplies and let's get started!
Supplies Needed
Before we dive into the process of embroidering a 3D rabbit, let's go over the supplies you will need for this project:
- Embroidery hoop
- Embroidery floss in various colors
- Embroidery needles in various sizes
- Fabric (cotton or linen works well)
- Scissors
- Stuffing material (such as polyfill or cotton batting)
- Fabric glue (optional)
Step 1: Choose Your Design
The first step in
embroidering a 3D rabbit is to choose your design. There are many
free patterns available online, or you can create your own. You can choose to embroider the rabbit's body, head, and ears separately and then sew them together, or you can embroider the rabbit as one piece.
Step 2: Transfer the Design
Once you have your design, transfer it onto your fabric. There are several ways to transfer a design onto fabric, including using a transfer pen or tracing paper. You can also print your design onto iron-on transfer paper and iron it onto your fabric.
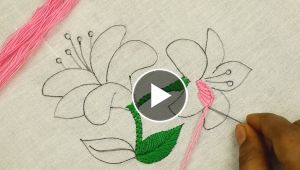
Step 3: Embroider the Rabbit
Now it's time to
embroider your 3D rabbit! Start by stitching the outline of the rabbit's body with a backstitch. Use a different color floss for each section of the rabbit's body. For example, use white floss for the rabbit's belly and gray floss for its back.After you've completed the outline, fill in the rabbit's body with stitches, such as the satin stitch or long and short stitch. Use different shades of the same color to create depth and dimension.Next, embroider the rabbit's head and ears. Again, use different colors to create depth and dimension. You can also add details, such as the rabbit's eyes, nose, and whiskers.
Step 4: Cut Out the Rabbit
Once you've finished embroidering the rabbit, it's time to cut it out. Cut out the rabbit's body, head, and ears, leaving a small border around each piece.
Step 5: Stuff the Rabbit
Now it's time to stuff the rabbit. Use polyfill or cotton batting to stuff the rabbit, making sure to stuff it firmly. You can also use fabric glue to secure the edges of the rabbit's body and head together.
Step 6: Sew the Rabbit Together
Finally, it's time to sew the rabbit together. Start by sewing the rabbit's body together, then attach the head and ears. Use a whip stitch to sew the pieces together, making sure to hide the stitches as much as possible.And there you have it - a beautiful 3D embroidered rabbit! This project is perfect for adding a touch of whimsy to your home decor or as a gift for a friend.
Conclusion
Embroidery is a beautiful and timeless art form that can be enjoyed by anyone. Embroidering a 3D rabbit is a fun and easy project that is perfect for beginners and experts alike. With a few simple supplies and some embroidery skills, you can create a beautiful and unique 3D rabbit that will be cherished for years to come.So why not give it a try? Embroidery is a great way to relax and unwind, and there's nothing more rewarding than seeing your finished project come to life. We hope this tutorial has been helpful in guiding you through the process of embroidering a 3D rabbit.Remember to have fun and experiment with different colors and stitches to make your rabbit truly unique.Happy stitching!